January 17, 2024January 16, 2024 Blockheads 5 – GROUP 2, BLOCK 3 – my turn! Hooray! These are my Shimmer Star blocks! I designed this block just for this round of Blockheads, and I love… Read More Read More
September 20, 2023September 20, 2023 Blockheads Block 2! Hooray! I’ve decided to play along with the Moda Blockheads (this is their 5th year!). The block I designed will… Read More Read More
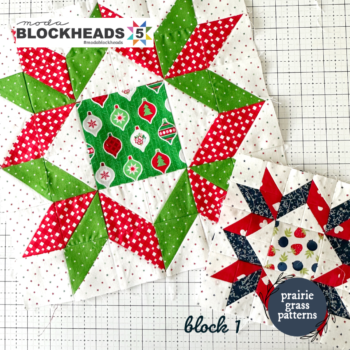
September 14, 2023September 20, 2023 Blockheads Block 1! Hooray! I’ve decided to play along with the Moda Blockheads (this is their 5th year!). The block I designed will… Read More Read More
September 7, 2023September 7, 2023 Blockheads Kickoff & Bonus Block! Hooray! I’ve decided to play along with the Moda Blockheads (this is their 5th year!). The block I designed will… Read More Read More
February 3, 2023February 3, 2023 Sewcialites Block #14 – Enchant Check out my cute Sewcialites block! It’s my turn to share my block today, and I love how this one… Read More Read More
August 7, 2022August 7, 2022 Protected: Alpine Templates There is no excerpt because this is a protected post. Read More
August 6, 2022 Midnight Moon QAL – Bonus Block 4 – Spooky Skull Hello! Today I’m sharing the fourth bonus block for the Midnight Moon Quilt Along. This block is called Spooky Skull!… Read More Read More
July 2, 2022July 1, 2022 Midnight Moon QAL – Bonus Block 3 – Cute Candy Corn Welcome friends! Today I’m sharing the third bonus block for the Midnight Moon Quilt Along. This block is called Cute… Read More Read More
June 4, 2022June 4, 2022 Midnight Moon QAL – Bonus Block 2 – Plump Pumpkin Welcome friends! Today I’m sharing the second bonus block for the Midnight Moon Quilt Along. This block is called Plump… Read More Read More
May 7, 2022May 7, 2022 Midnight Moon QAL – Bonus Block 1 – Batty Bat Welcome friends–today I’m sharing the first bonus block for the Midnight Moon Quilt Along. This block is called Batty Bat… Read More Read More
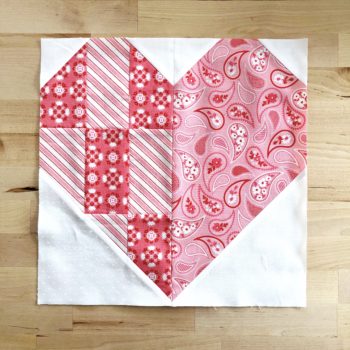
April 1, 2022May 10, 2022 Heartfelt Charity Block 3: Darling Block It’s that time again! Here’s this month’s Heartfelt blocks! This block is called Darling, and I love how bold it… Read More Read More